In my previous post I talk about JTable and JPA pagination through a custom TableModel.
Now working directly with TableModel is not want you want to do, you want to use Beans Bindings because it means less manual coding and a lot of help from the IDE (like Netbeans).
With netbeans you can easily bind a JTable to the result list of JPA query. But if that Query returns thousands of rows it’s going to be slow or unfeasible. And if you try to use JPA pagination (with Query.setMaxResults()) then you end with a table that will only show a subset of the rows.
By the way, choose wisely your JPA Provider/DB Provider combination, as some combinations will not give you any real paginations at all. For example, neither OpenJPA, Hibernate or TopLink/EclipseLink seems to support Apache Derby pagination (OFFSET/FETCH). The example here uses Derby and TopLink which is a bad example because the JPA pagination doesn’t get translated to SQL command for pagination. So if you really want proper pagination you should use other combination like Hibernate JPA/HSQLDB.
The “trick” here is to avoid binding the Table to the the result list given by the Query.getResultList(). You can create a custom List that does the JPA pagination behind the curtains and bind the JTable to that List instead.
How is this different from doing a custom TableModel? custom TableModel, custom List sound like the same amount of work. Well, right is the same amount of work but if you use Beans Bindings you get a lot of help from the IDE to manipulate the JTable graphically, etc.
You can follow any of the existing tutorials to create JTables bound to JPA entities to get an idea of how Beans Binding work.
Now I’m going to modify the test aplication from my previous post to use Beans Bindings together with the JPA pagination.
I’m assuming that the Entity class Customers from the previous post is already there, and TopLink and derby jars are in the classpath.
Here are the steps to create a JTable bound via Beans Binding to a List backed by a JPA Query:
Right-click on the project New ⇒ JFrame Form
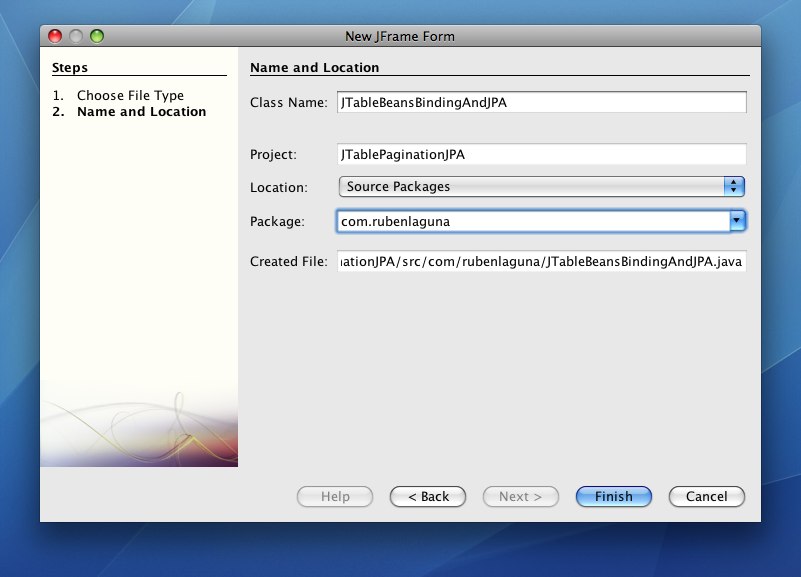
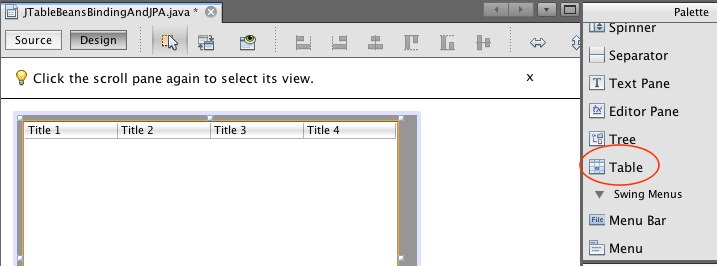
Add the Table from the Palette to the JFrame
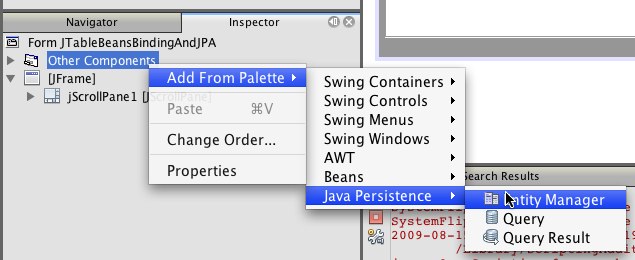
Now we can add the EntityManager and the Query. Instead of adding those manually by typing we can add them graphically. Right-click on the Other Components item on the Inspector Window and selecting Add from Palette ⇒ Java Persistence ⇒ Entity Manager
Now we can configure the EntityManager by selecting it in the Inspector window and changing the properties in the Properties windows.
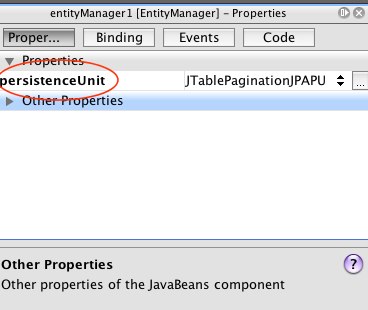
In this case we change the persistenceUnit to “JTablePaginationJPAPU” .
Then we can add the Query to the form. Inspector ⇒ Other Components ⇒ Add from Palette ⇒ Java Persistence ⇒ Query
And then we configure the query by changing its name to getRowsQuery and changing the query property to “SELECT c FROM Customers c” and the entityManager to “entityManager1”:
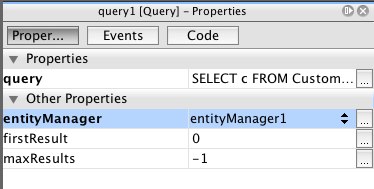
Add a second query to the form to get the number of rows in the table. Call it getRowCount and set the entityManager to “entityManager1” and the query to “SELECT COUNT(c) FROM Customer c”
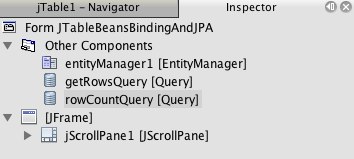
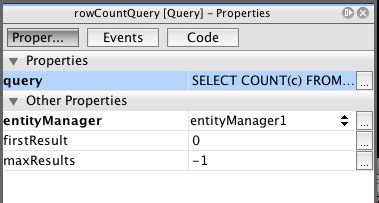
Now we need a Query List because that is what we will bind to the JTable. Again Inspector ⇒ Other Components ⇒ Add to Palette ⇒ Java Persistence ⇒ Query Result.
We could link the Query Result to the Query but we won’t do that because then we don’t get pagination. What we will do with the query result is to change the “Custom Creation Code” property to “getList()” a method call that we will implement later. We also change the “Type Parameters” property to <Customers> to let the IDE know the type of objects stored in the list so netbeans is able to make suggestions later when we bind the JTable to this list.
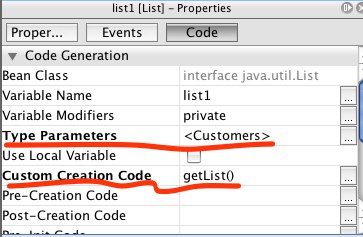
Now we add the getList() method to our class
private List<Customers> getList() {
  List<Customers> toReturn = new ResultListJPA<Customers>(rowCountQuery, getRowsQuery);
  return toReturn;
}
You can create ResultListJPA class in the same file:
class ResultListJPA<T> extends AbstractList<T> implements List<T> {

  private final Query rowCountQuery;
  private final Query getRowsQuery;
  private int startPosition;
  private int counter=0;
  private List<T> cache = null;

  ResultListJPA(Query rowCountQuery, Query getRowsQuery) {
    this.rowCountQuery = rowCountQuery;
    this.getRowsQuery = getRowsQuery;
    this.startPosition = 0;
    this.cache = getItems(startPosition, startPosition + 100);
  }

  public int size() {
    return ((Long) rowCountQuery.getSingleResult()).intValue();
  }

  public T get(int rowIndex) {
    if ((rowIndex >= startPosition) && (rowIndex < (startPosition + 100))) {
    } else {
      this.cache = getItems(rowIndex, rowIndex + 100);
      this.startPosition = rowIndex;
    }
    T c = cache.get(rowIndex - startPosition);

    return c;
  }

  private List<T> getItems(int from, int to) {
    System.out.println("numer of requests to the database " + counter++);
    Query query = getRowsQuery.setMaxResults(to - from).setFirstResult(from);

    //add the cache
    List<T> resultList = query.getResultList();
    return resultList;
  }
}
OK, now we’ll bind the result list object with the JTable. Right-click on the JTable and select Table Contents ⇒ Bound ⇒ Binding Source ⇒ list1 . list1 is the name of the ResultListJPA object in my case.
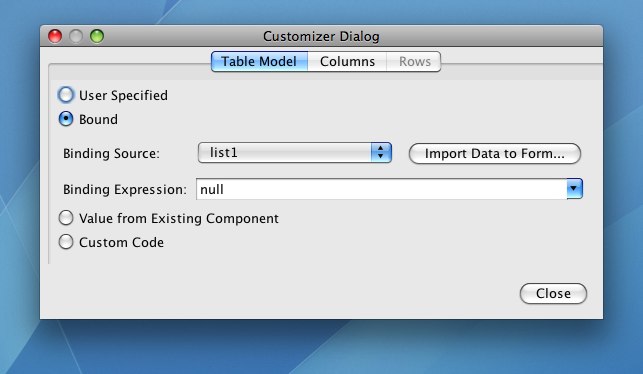
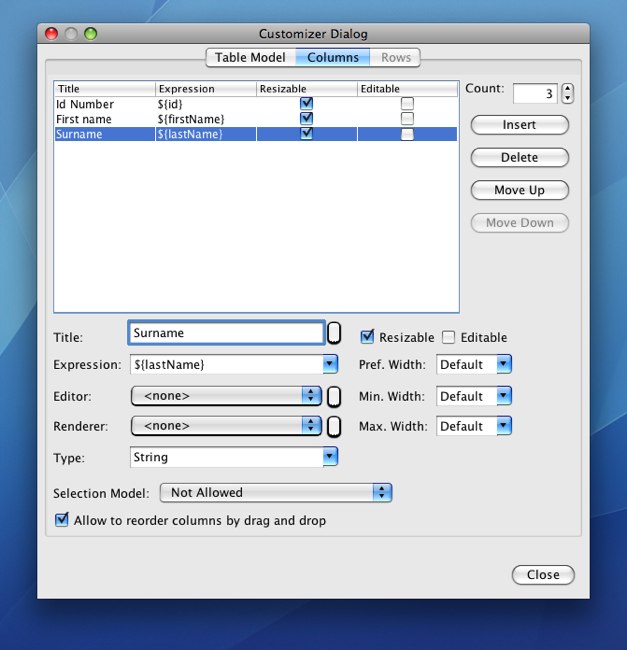
Now click on the Columns tab and Insert 3 new columns. Select the first one and change the Title to “Id Number” and select “id” in the expression combo box (it should appear as ${id}).
Do the same thing for the other 2 columns until you get something like this
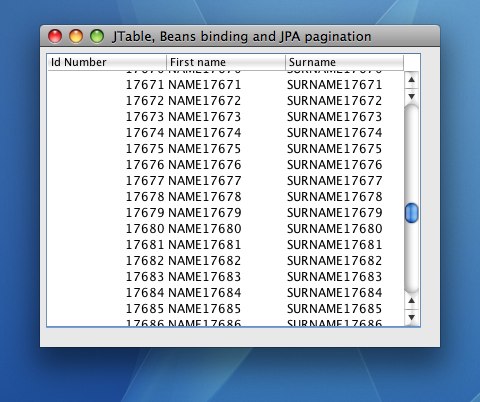
Now the JTable is properly bound to the list and we can run the file. You can see in the screenshot that the JTable shows the contents of the database and it makes new queries to the database as you scroll through the JTable.
The source code is here